
 Skip to content
Note: This blog post was created by the StackSpot Prompt Engineering team with the support of AI tools. This content underwent rigorous review for technical accuracy, content relevance, and well-written quality before its publication. Enjoy the read!
In today’s blog post, we will continue to learn more about the StackSpot Platform. Now, we will take a deep dive into the mechanism of Plugins and how StackSpot helps organize our teams. Let’s see how (and the benefits) of organizing plugins in studios.
What is a Plugin?
In a previous post, we introduced the idea of Plugins. If you haven’t read it yet, take a look before proceeding. Plugin on StackSpot is the mechanism where you can productize code and make it available as scaffolds for the organization. This eases the adoption of standards and decreases the cognitive load of those who need it.
Organize Plugins in the Studios
It’s natural for a company using StackSpot to create lots of Plugins for a variety of purposes. But this brings up a necessity: How can we organize them to ease access for each one of them?
StackSpot provides the solution for this, we have a “Studio.” Studio groups Plugins with the same topic. In a company, there might be people developing many Plugins based on Spring, React, NextJS, ASP.NET MVC, etc.
You can create a new Studio on the platform. The first step is to log in with your account (personal or enterprise) [link to the plugin creation post]. Right after, access the “Studios” menu.
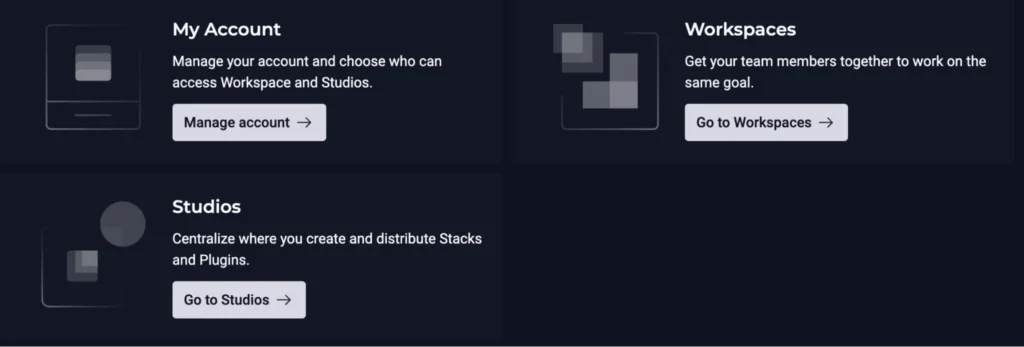

In the Studios area, you can create your own and view those available for your profile. When you click on “Create Studio”, a new wizard will appear for you to proceed.
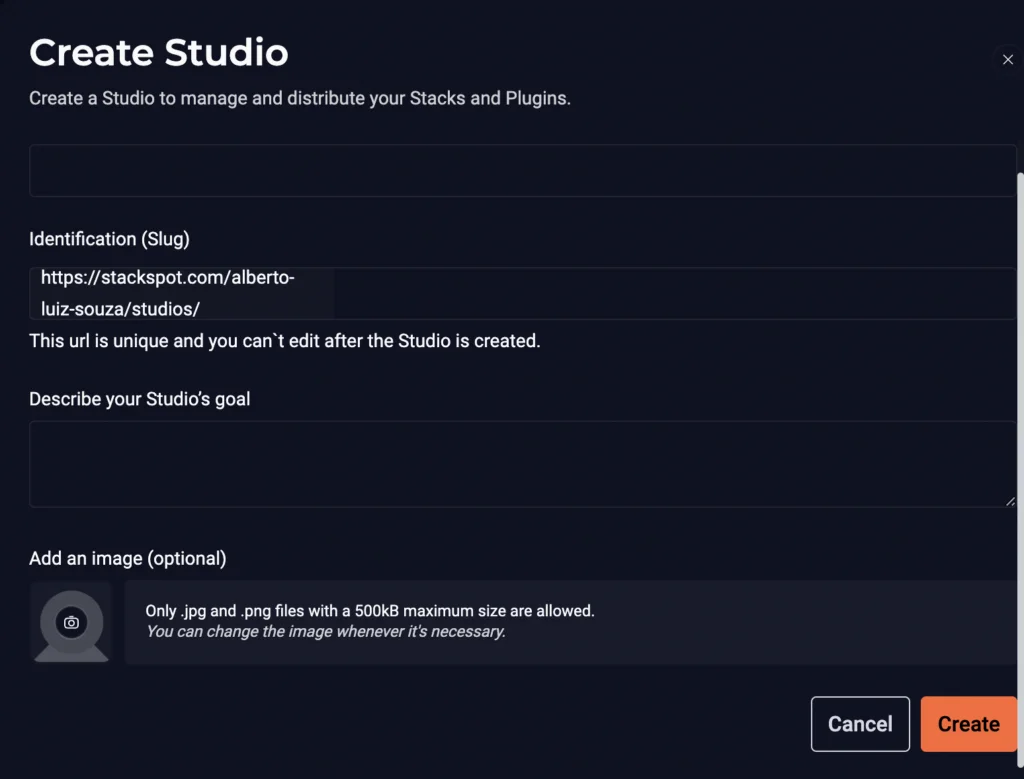
Every Studio has a name and a description. You can upload an image as well.
Other people in your account can access your Studio resources. But only if they have authorization via an HTTP address.
Publishing the Plugin in a Studio
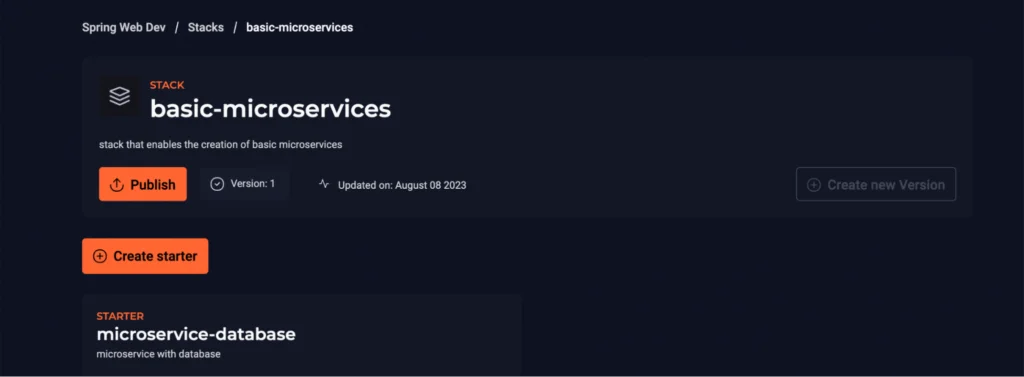
After setting up our Studio, we can now publish relevant Plugins on it. In the account used as an example for this post, there is a Studio named Spring Web Dev.
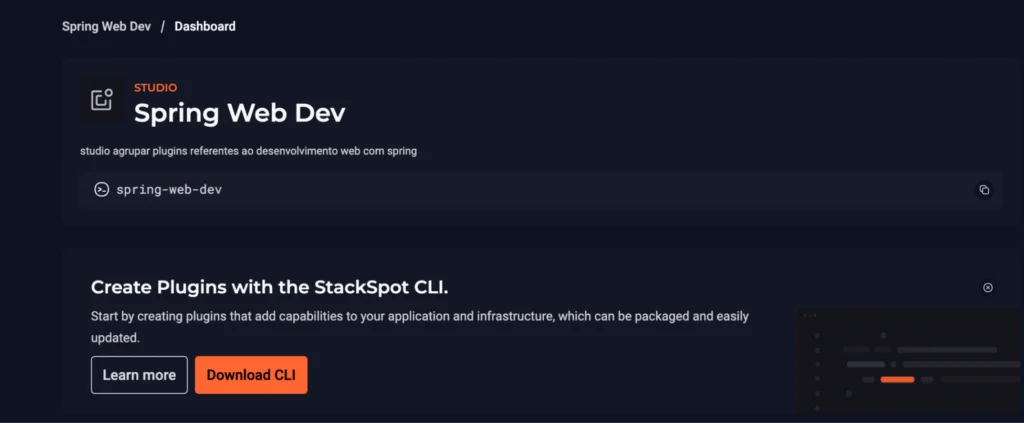
When we click on an existing Studio, we’re directed to the Studio’s detail screen. We will find information, like the Studio’s slug. The slug is a global identifier for your Studio in your account. When you name it, StackSpot transforms letters to lowercase and replaces spaces with hyphens. This style of writing, in code, is kebab-case. For our Studio, the slug is “spring-web-dev”.
Now, to publish the Plugin in this Studio, we’ll follow some steps. To make it easier, we’ll use the same Plugin we created in another post.
The first step is to access the terminal to use the StackSpot CLI. You need to log in so the commands are contextualized. To do that, run the following command: stk login. If you’re using a personal account, log in with your GitHub account email. In this case, the email needs to be public there.
After logging in, we’ll publish the Plugin in the Studio. Go to the folder of the Plugin you’ve created and run the stk publish plugin command. The next step is to add the slug of your Studio. For this post, it will be spring-web-dev. At the end of the terminal output, you’ll see a ‘Published successfully’ message.
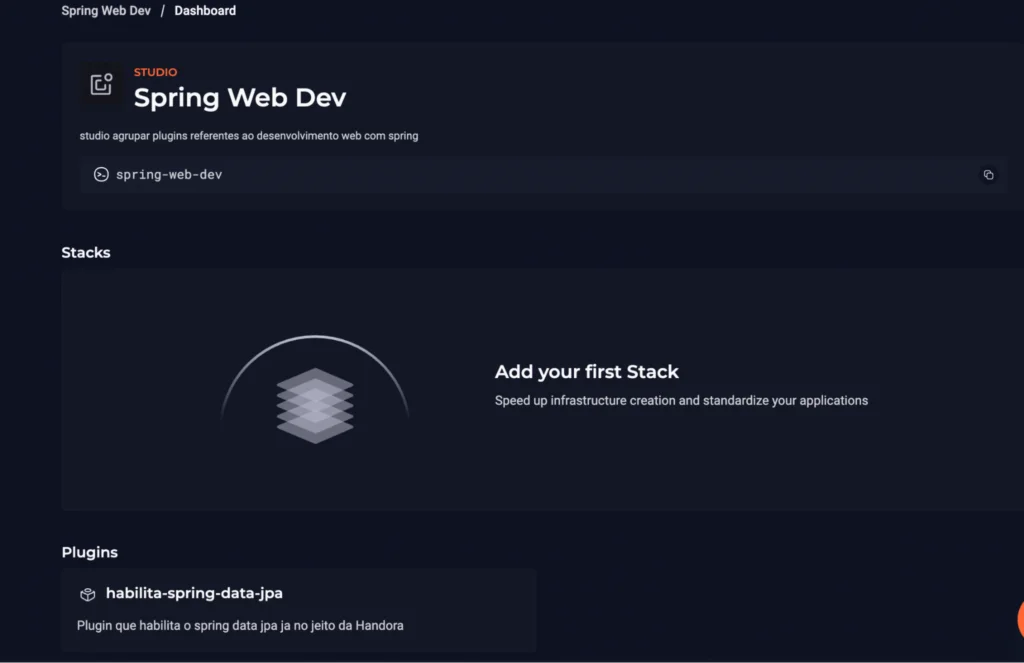
Now, you can list the Plugin via the StackSpot portal.
Applying a Plugin available in a Studio
As mentioned before, one of the main reasons to have an Internal Developer Platform (IDP) or similar platforms is to enable the developer team to work on business problems rather than repetitive technical details.
After adding the Plugin to the Studio, you need to apply them. But first, check the Plugin’s details, you have the following view:
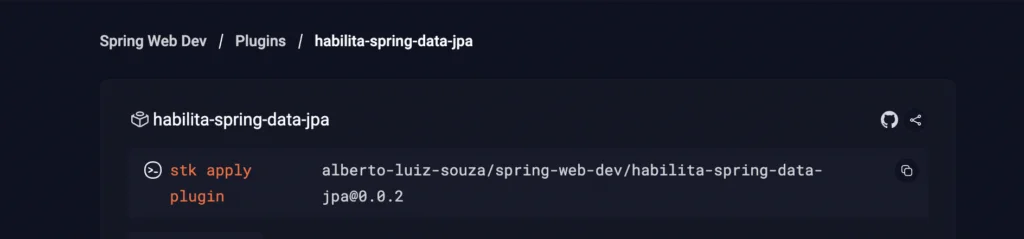
It is necessary to run a command from the studio, in this case, it is: stk apply plugin alberto-luiz-souza/spring-web-dev/habilita-spring-data-jpa@0.0.2. The end of the command is the current version of the Plugin.
Identifying scaffolds and organizing them through Stacks and Starters
Now we have a Studio. Let’s add Plugins into sets to create new projects more easily. For example, in the Studio related to web development with Spring, you can have a set of Plugins associated with the creation of traditional microservices. And another set related to reactive microservices. Each one of these sets is called a Stack in StackSpot.
Creating our first Stacks
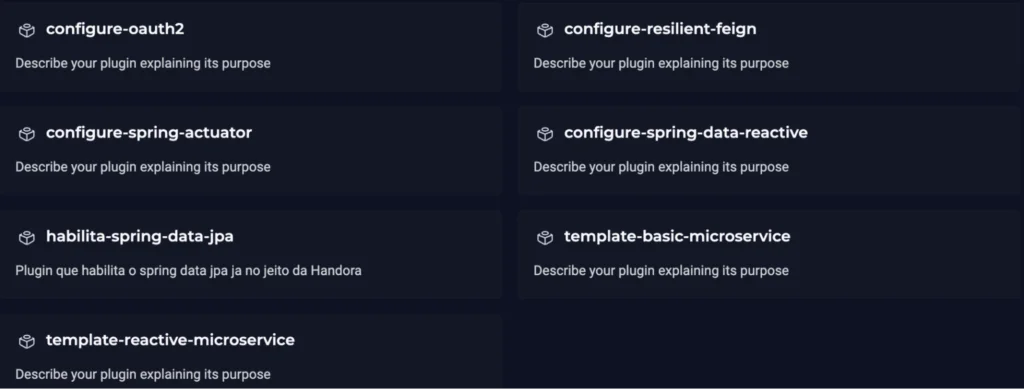
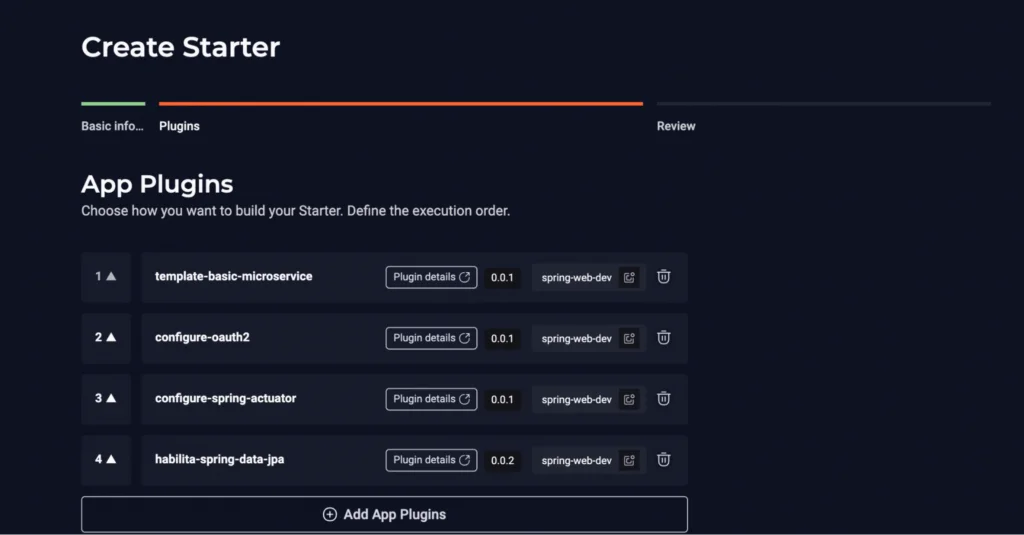
Before we create our Stacks, let’s check which Plugins are available in our Studio:
Now we will add into Stacks those Plugins. The idea is to organize them into the Studio to make it easier to create new projects following the company’s engineering guidelines.
A Stack to create traditional microservices can be:
- template-basic-microservice
- configure-spring-actuator
- configure-oauth2
- configure-spring-data-jpa
A reactive Stack may have:
- template-reactive-microservice
- configure-spring-data-reactive
- configure-spring-actuator
- configure-oauth2
There are no problems overlapping Plugins between Stacks. Or even omitting some Plugins you don’t need right at the project creation stage.
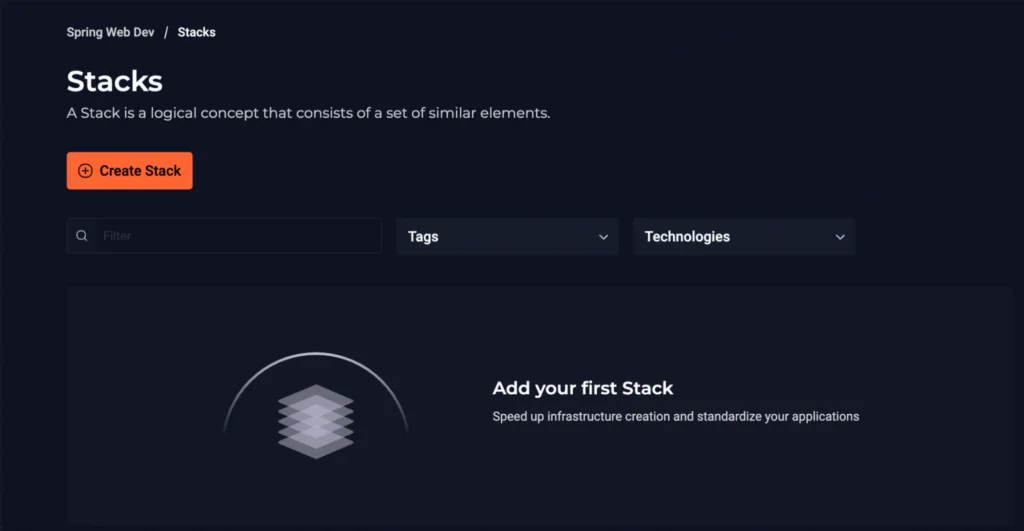
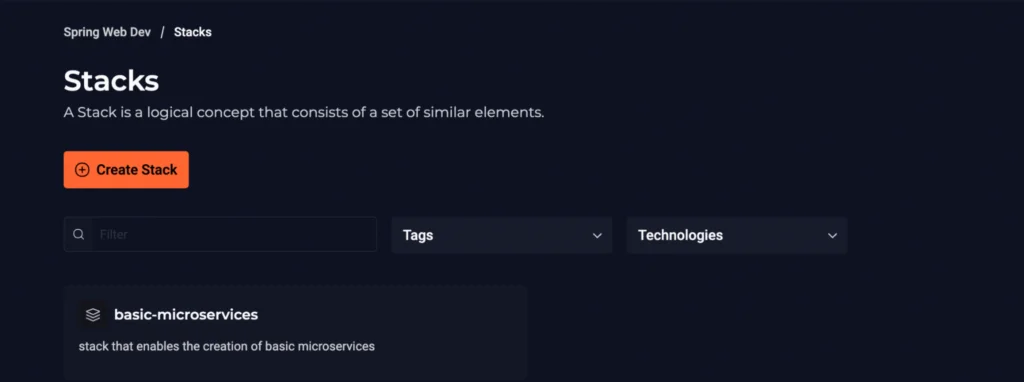
To create a Stack, go to the Stacks menu in your Studio. Flow this through the StackSpot Portal.
On the left side, right below the Dashboard option, you can access the Stacks option. When you click, you will go to the Stack creation screen.
Now, just click on the “Create Stack” button. After filling out the required fields, we have our first Stack.
It’s time for the Starters
In a Stack, we can have different combinations to create applications easily. These combinations are called Starters.
In the Stack we named basic-microservices, we can create a service that requires the use of a database and another that doesn’t. But, we want all microservices to be created with authentication and the necessary observability settings. Given this scenario, we can build two starters:
- Microservice-database
- Microservice-without-database
Sorry for the not-so-creative names. Now, let’s walk through the steps to create a Starter.
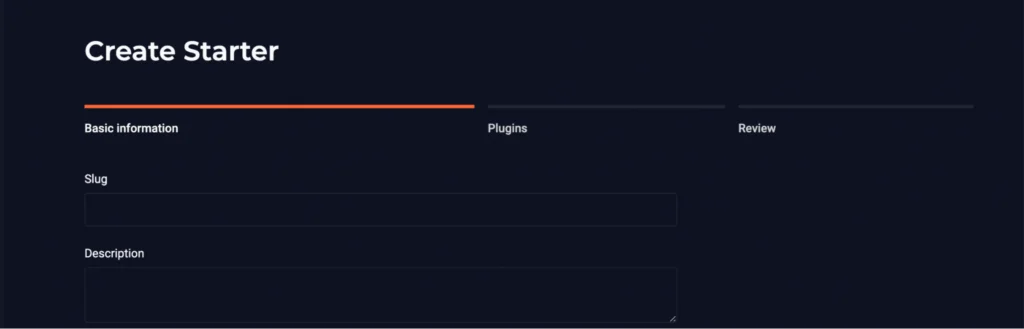
In the Stack, you need to click on the “Create Starter” button.”

The first step is to decide on the slug and provide a description for the Starter:
The second step is to add relevant Plugins for that Starter:
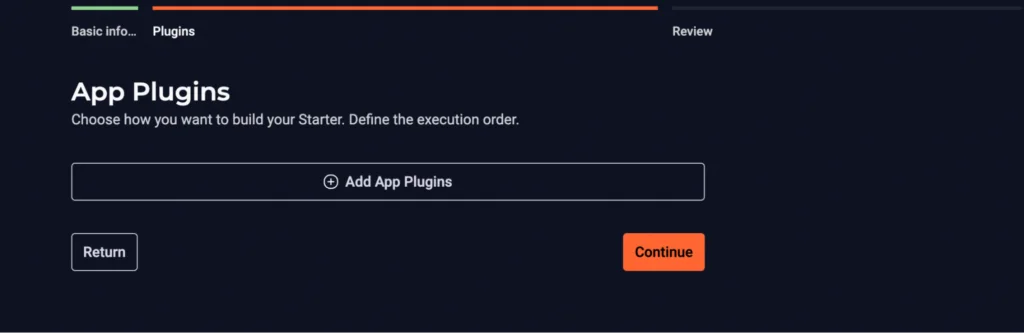
After adding them, don’t click continue yet. Analyze the order in which the Plugins should be applied.
The order to apply a Plugin is very important. Generally, you will have one Plugin that sets up the foundation of the project, and what is defined there can be used by other Plugins.
More specific Plugins might need certain variables defined by the first Plugin in the Starter, which we can refer to as the template. It’s as if they need a public interface from the “template plugin”. The idea here is:
- You can change the base plugin, but you need to make sure it exports the same variables and creates at least the same structures as the previous one.
- Another option is each Plugin always requests everything it needs (stateless), but this approach demands more work from the developer.
Now, we can proceed to the review stage. There, we have one more opportunity to check everything we’ve set up.
Publishing your Stack
Now that we have at least one starter in the Stack, we can make it available to others in our account. And once a Stack is published, it has a version and, from that point on, it becomes immutable. For any updates, publishing a new version will be required.
Notice that the “Publish” button is now available. All that’s left is to complete publishing it.
Technology is now more organized, time to organize the people
We have our versions of Plugins, Stacks, and Starters. It’s time to organize who can access these resources in your organization. We want to make it easier for people working together to access a set of resources that make sense for that context.
We are talking about organizing people around the same goals and giving them access to relevant technological resources. StackSpot introduces the concept of Workspaces.
In the Portal menu, you can find the option to go through the Workspaces of your organization. It’s time to create our first Workspace.
First, let’s navigate to our Workspaces area. Now we need to create our first one. After pressing the creation button, a wizard-like what follows is displayed.
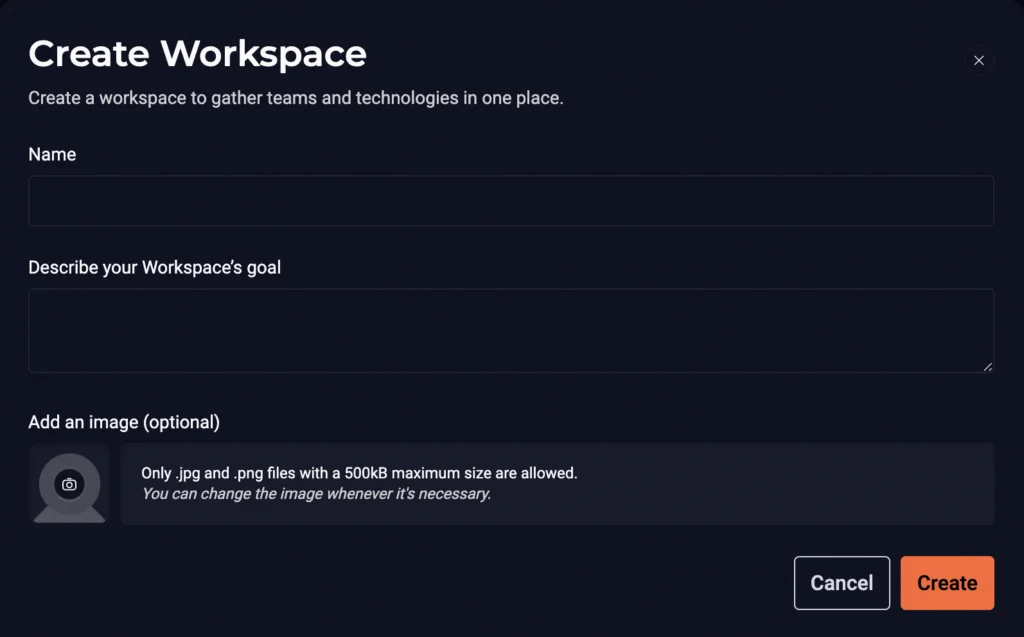
Fill out the name and description of your Workspace. We’re talking about connecting people around a common goal. So, your Workspace might relate to a product that’s being developed, for example.
After creating your Workspace, you can add applications and Stacks to it.
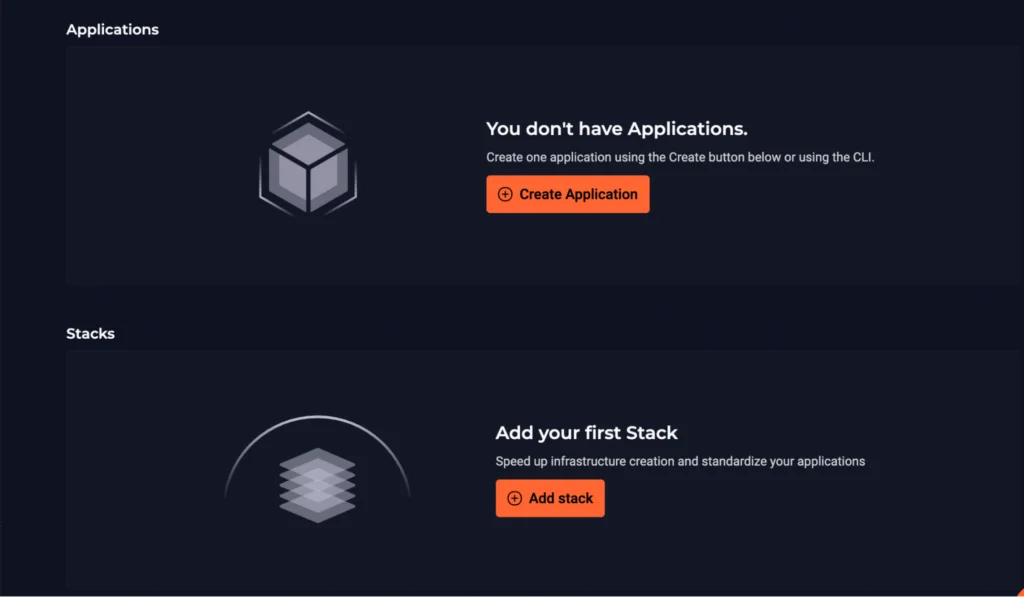
Remember we are focusing on the platform engineering journey of people who create technologies. This will speed up daily activities, let’s proceed to add a new Stack.
After clicking to add a new Stack, the list of what we have available will be displayed.
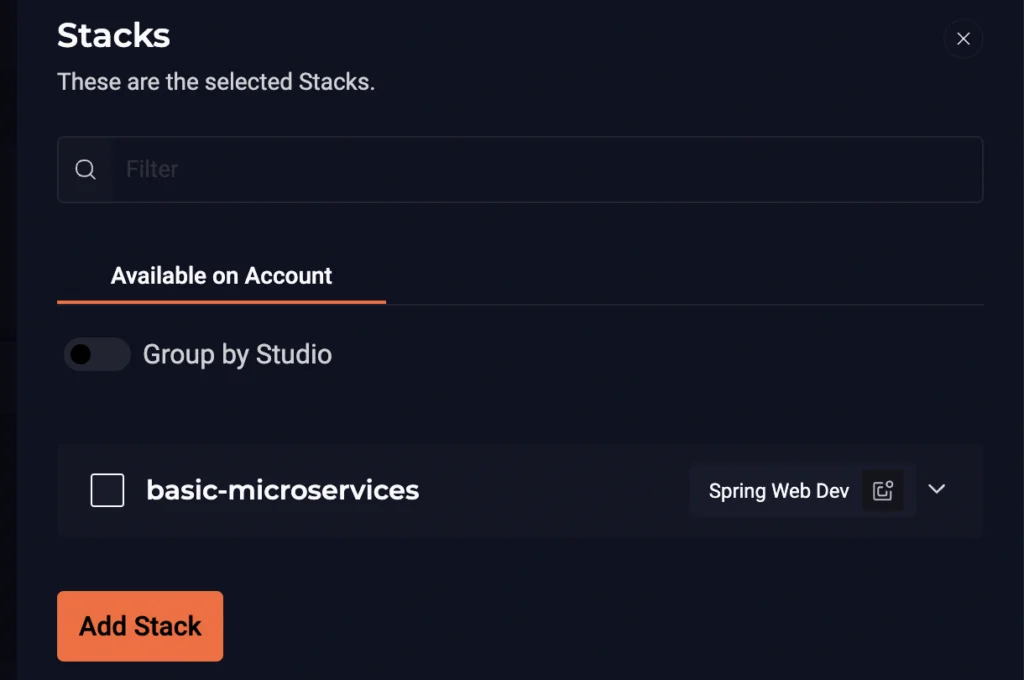
There may be a definition stating that only certain Stacks are available for that product. So, whoever is in that Workspace has the option to choose what best fits them.
How to apply Plugins and Starters from a specific Workspace
We added Stack in the Workspace, which has its Starters and their Plugins. This is the set of features we access in a Workspace, at least for now :).
Now, we will show the workflow when you are part of a Workspace. From your terminal, the first step is to list the Workspaces, so you can identify yours. The command is stk list workspace. When executed, you get an output on the console with the list.

The list showed the only one we created. Another important detail, there is a message indicating which Workspace is active. At this moment, none. The next step is to activate it. For this, we will run the stk use workspace NextBigThing command.
The list now is:

Notice that we now have an asterisk next to the name of the active Workspace. If you want to exit a Workspace, type the stk exit workspace command.
In a Workspace, we can now list what we are interested in:
- stk list stack to list Stacks.
- stk list plugins to list the Plugins of the Stacks.
- stk list starter to list the Starters of the Stacks.
For example, to apply a Plugin in the context of a Workspace, we use stk apply plugin <studio>/<stack>/<plugin>. To apply a Starter during the creation of a new application, we use the same syntax: <studio>/<stack>/<starter>
Conclusion and what is coming
In today’s post, we had a deep dive into the mechanism of Plugins and how StackSpot helps organize our teams. We will continue to explore the platform’s possibilities to standardize.
Looking ahead, we will discuss how to consume internal APIs and more. We also provide support for creating and organizing teams within Workspaces. There’s still so much more to come.